
I started this project to see what I could do with eye gaze control and low cost hardware. I set out to have an eye gaze setup that would be able to do the following:
-drive the wheelchair
-control appliances remotely
-control a robotic arm and grabber
This type of setup could further enable someone with a disability such as ALS even if they only still have control of their eyes. Modifying this setup for switch control instead is also completely possible.
Below are videos and pictures of this first version.
I found 2 affordable eye trackers on the market The Tobii EyeX($139) and the Eye Tribe Tracker($99). I mostly used the EyeX since from my initial testing it seemed more tolerant of motion and changing light levels. The Eye Tribe Tracker was usable in this setup, but my experience was better with the Tobii EyeX, ymmv. I was able to find a used power wheelchair for $300. For control electronics beyond what the wheelchair already had, I used an Arduino($25) as the main controller for everything. A Motor Shield($20) from Adafruit controls the robotic arm motors.
For now my laptop is needed to get info from the eye tracker and to run the display. It sends what button was activated to the Arduino over USB.
The Arduino then sends control info to the power wheelchair via its joystick port. I used the same approach as I used in this project: https://bobparadiso.com/2014/10/28/ble-controlled-wheelchair/
It’s also easy to instead connect the Arduino to an R-Net Omni which has a well documented interface:
Click to access pgdt_omni_manual_SK78813-03.pdf
Example:
http://blog.jaybeavers.org/3rd-generation-wheelchair-interface/

The Arduino also directly drives the robotic arm motors and drives the IR/RF transmitters to control surrounding appliances.
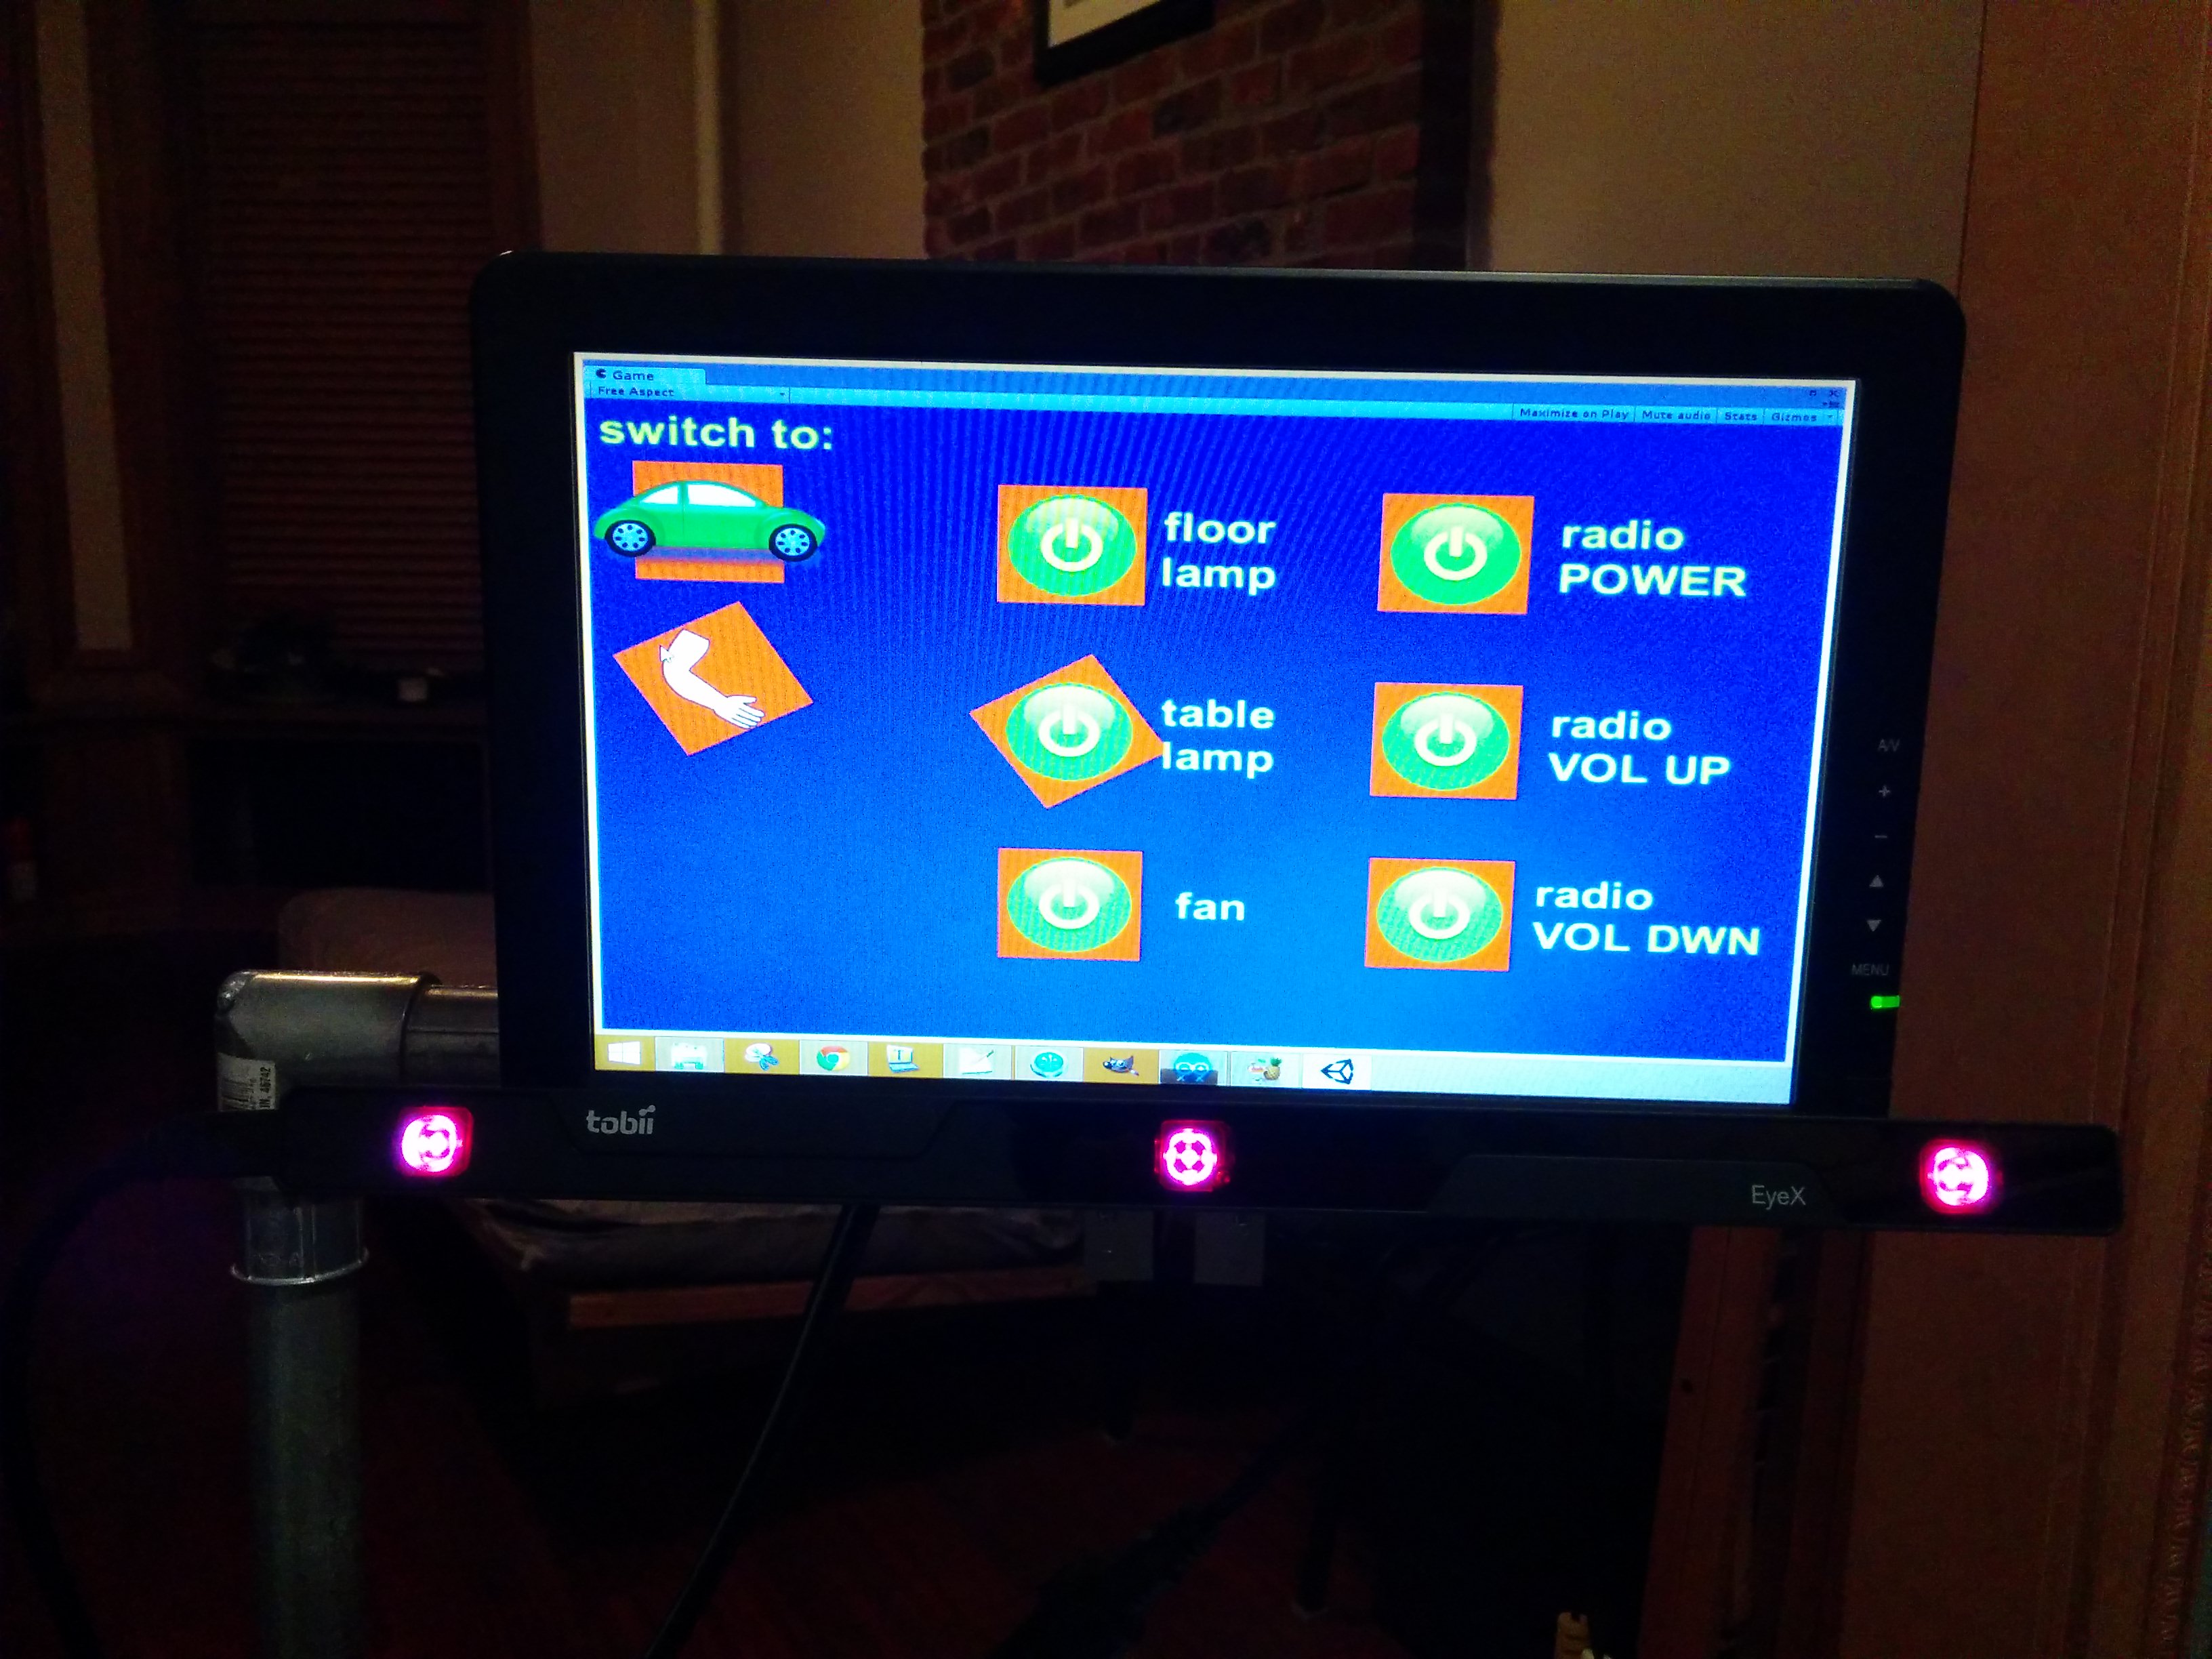
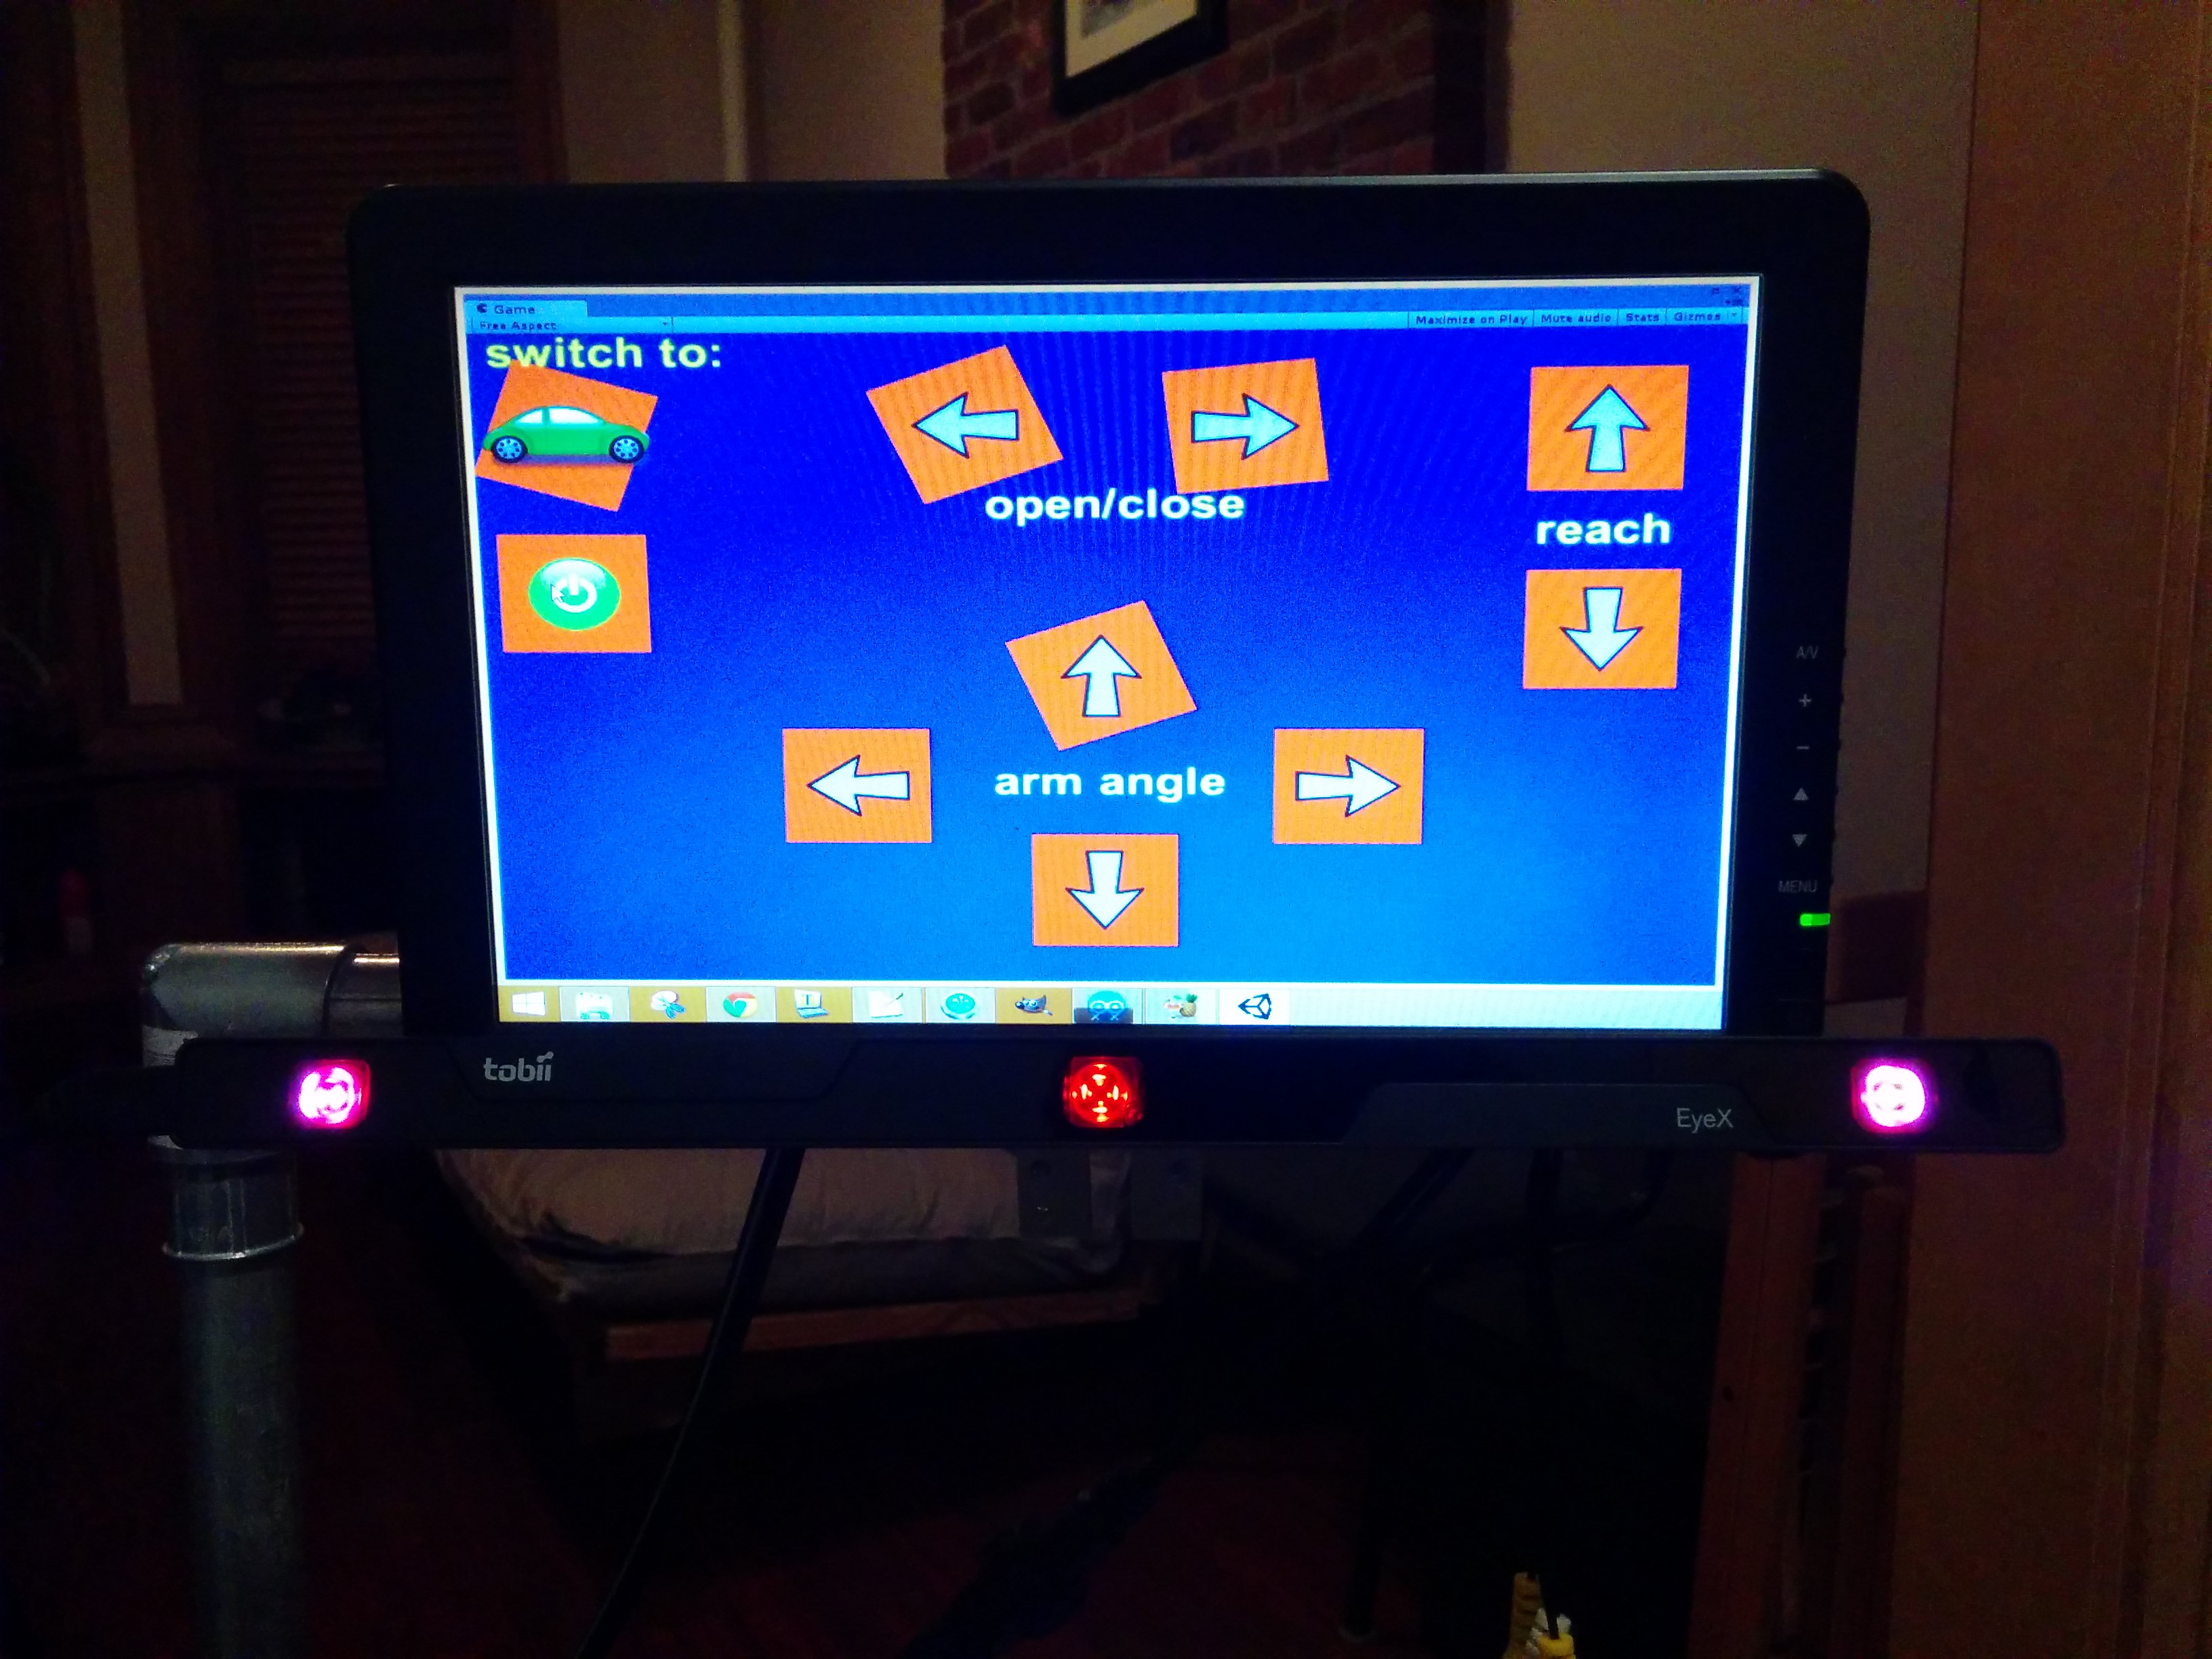
All the UI on the display is through Unity3d. Each screen is a separate Unity “scene”: Drive, Arm, and Power.


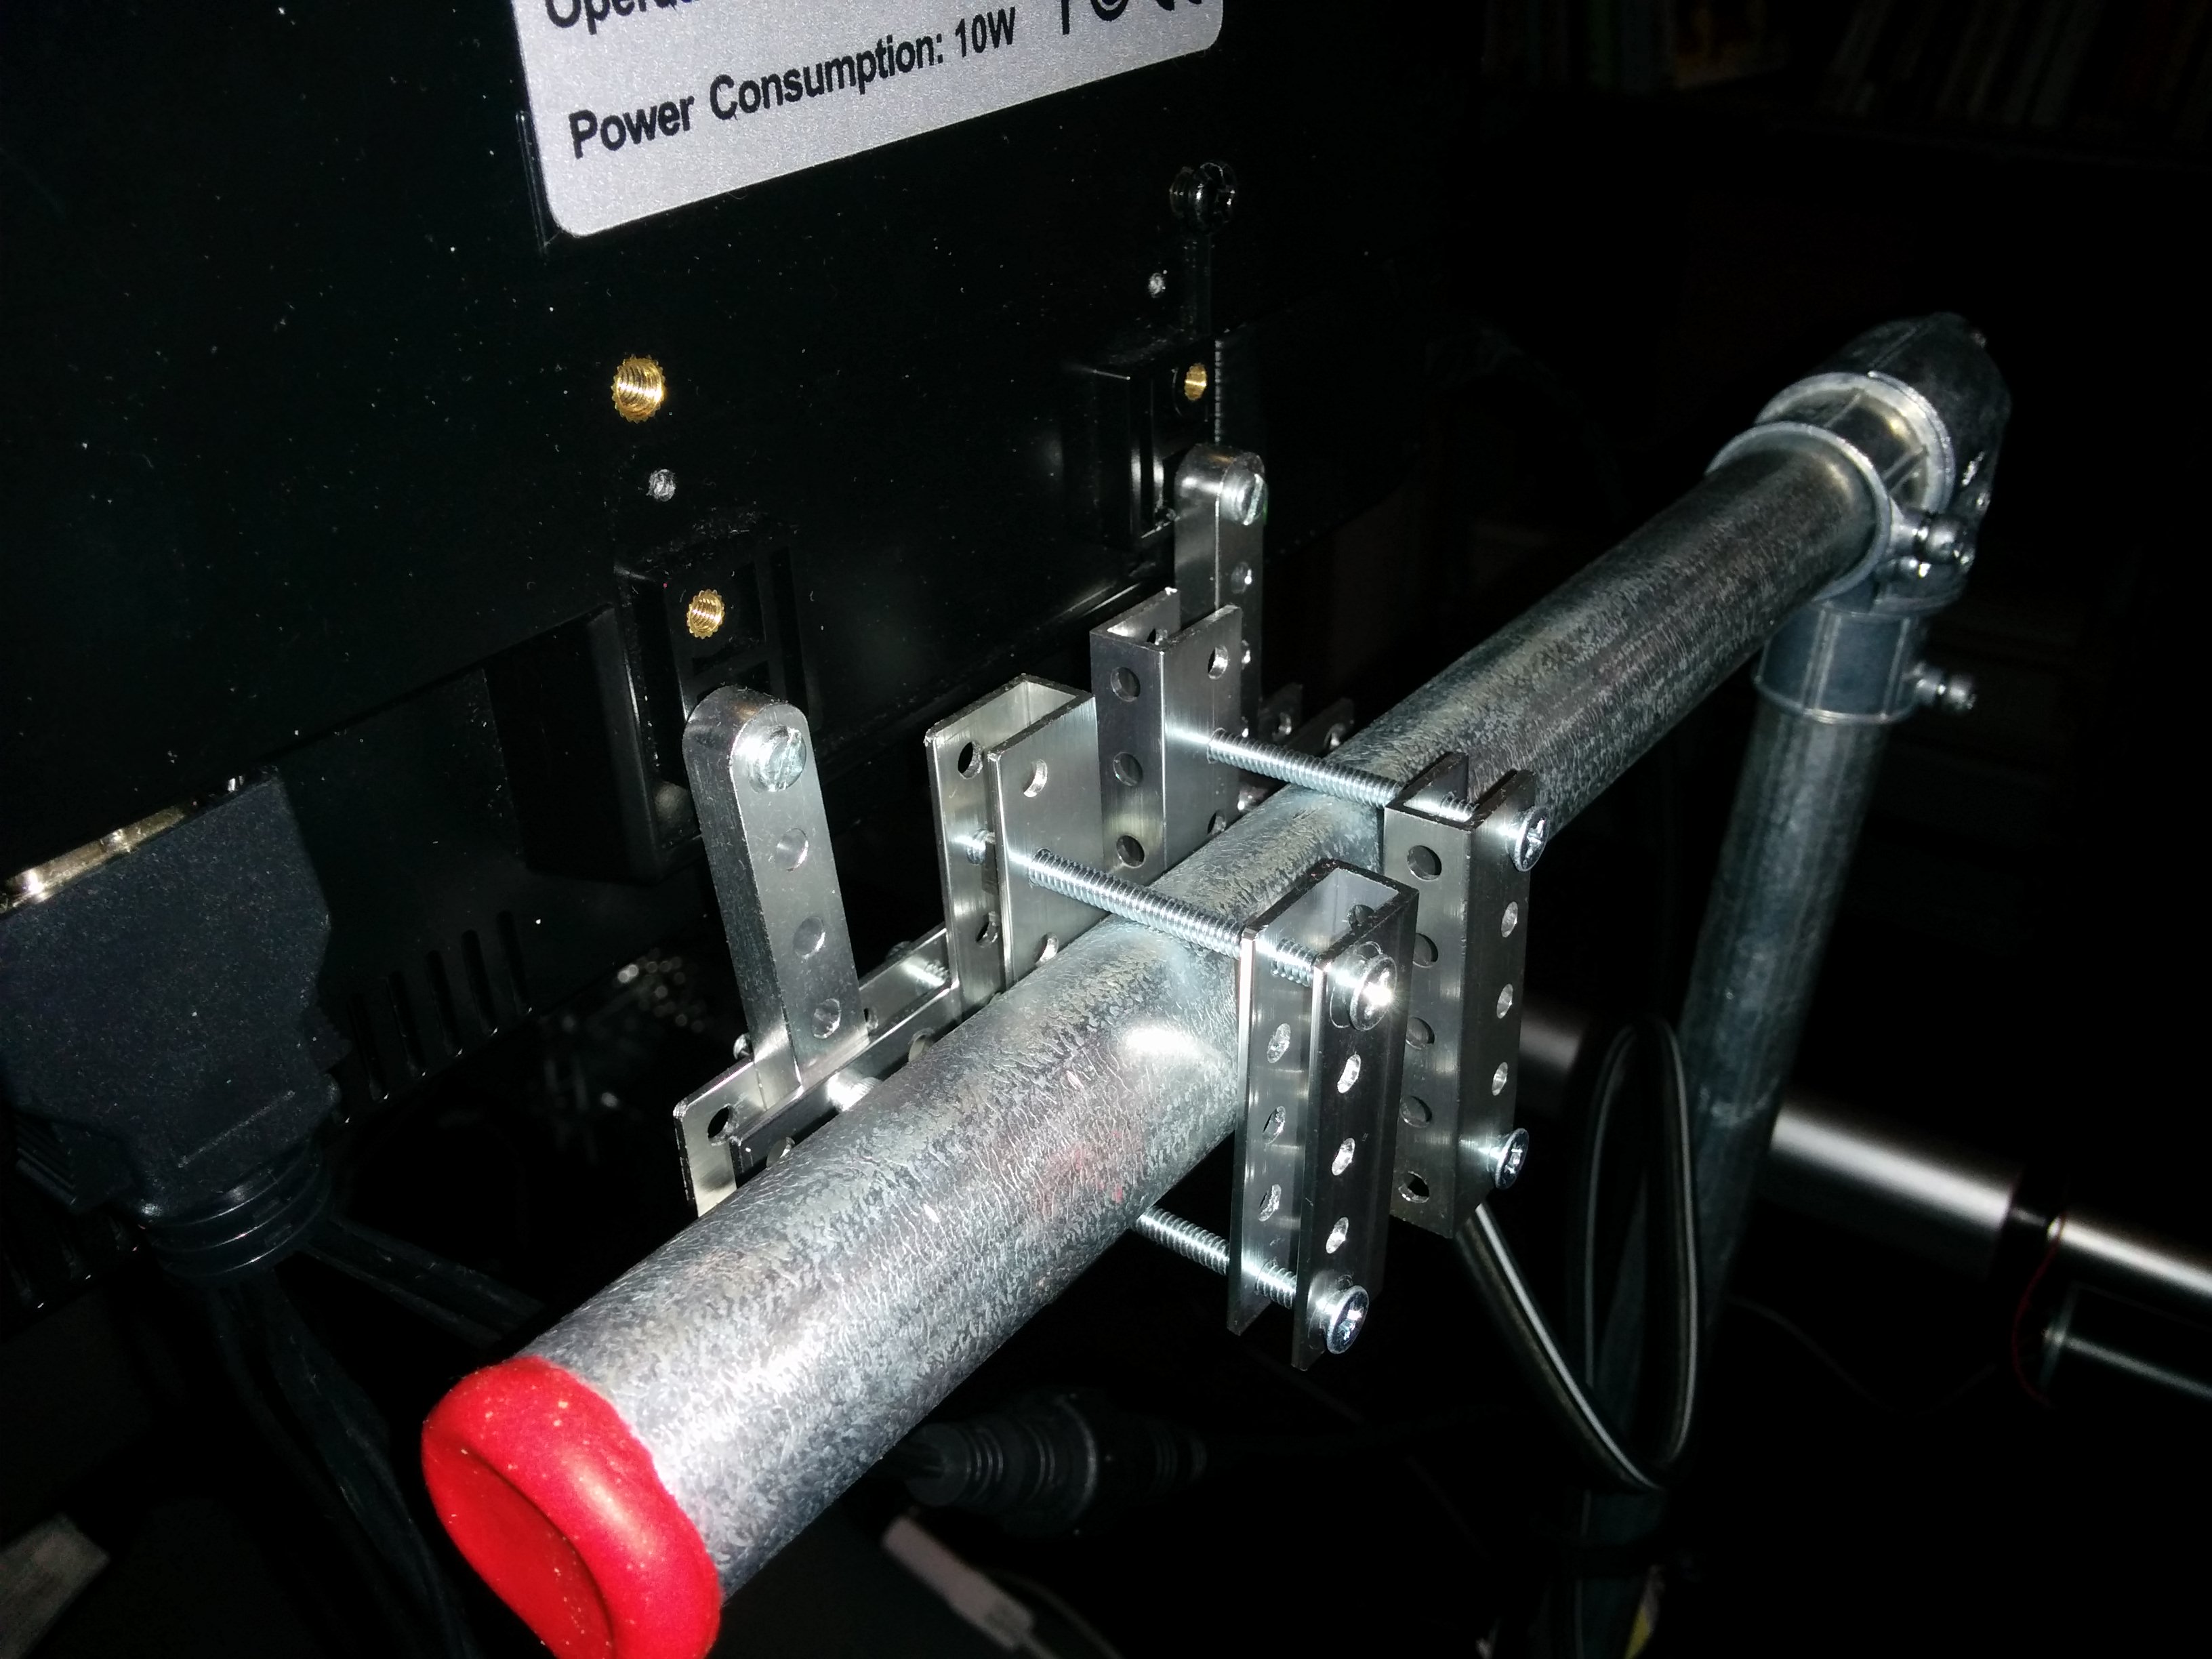
Actobotics parts and electrical conduit were useful for the arm and mounting the display:


These are the Unity scenes for the UI:

Misc electronics for power, control, RF tx:


From my testing so far, some things work pretty well, others are harder to use. Especially outside I noticed that bumps, glare hitting the camera, other people, and uneven sidewalks complicate navigation. It’s still usable, but I’m hoping to make it better.
Below are some links for parts.
Eye trackers:
http://www.tobii.com/en/eye-experience/eyex/
https://theeyetribe.com/
Some metal brackets, channel, beams, etc. for arm and gripper:
https://www.servocity.com/html/actobotics1.html
Electrical conduit to hold the display:
http://www.lowes.com/ProductDisplay?productId=3130169
http://www.lowes.com/ProductDisplay?productId=1100249
Arduino and arm motor controller:
https://www.adafruit.com/products/50
https://www.adafruit.com/products/1438
LM2596 based DC-DC buck converters to efficiently get the 24V from the batteries to whatever output voltage I need:
http://www.amazon.com/RioRand-LM2596-Converter-1-23V-30V-1Pcs-LM2596/dp/B008BHAOQO
Here’s the code repo:
https://github.com/bobparadiso/wheelchairEyeGazeECU

6 thoughts on “Eye gaze controlled wheelchair, robotic arm and ECU”