
I had been debating spending the money on an SDR like the HackRF One for a while and finally decided to go for it. It’s a software defined radio, which in short means it can be configured in software to receive or transmit on any of a wide range of frequencies using any modulation type and packet format. This enables among other things, recording and analyzing the RF signals that come out of a remote control and then emulating it with other hardware to allow for implementing alternate controls. One example being controlling a Lionel model train set with an Amazon Echo. The video below shows the end result in action.
Note that there are many situations where you wouldn’t or don’t need to use an SDR to even capture the RF signals. Firstly of course if you have an infrared remote as most TV’s and AC’s have then that’s IR, not RF.
Secondly, if this is a one off project, and you’re willing to sacrifice the remote (or buy another) you can open up the remote control, and wire directly to it, having it still be what sends the final RF signal.
Lastly, if you know the frequency and modulation being used (which you can if you have FCC ID from the device) and if you can get a cheap receiver and transmitter compatible with it, then of course you can wire directly to those. An example of that is using cheap 433 Mhz modules to record and playback various commands like I did in the second version of this project: Voice Activated Life Alert
All that said, even though there are many ways to do this project, it was a lot of fun and a good learning experience to use an SDR to analyze the communication between this model train and its remote. The SDR itself and what I learned will be valuable tools for future projects.
Also, once I understood what has to be transmitted to control the train, I was able to implement that part of the project with a cheap nRF24L01 module. Here are some pictures of all that had to be done on the electrical side, just wiring the nRF24L01 module to the ESP8266 board. The ESP8266 runs as a Wemo emulator so Amazon Echo can discover it and turn on and off different things by voice command such as train forward and reverse. The nRF24L01 sends the actual corresponding RF signals periodically.


While I was doing my initial testing and figuring out stuff, I didn’t actually want the train zipping around. But it became clear that the remote would detect if the train was not there and powered. To get around this I used jumper cables to power the train without its wheels touching the track. You could clip the other end of the cables directly to the track like this first picture, but I didn’t want to mark the metal and have the track less smooth so I think it’s better to clip to the underside like I did in the second picture.


Rather than opening up either the train or remote, and rather than just poking around the RF spectrum, you can often look up the FCC ID to learn what frequencies are being used and sometimes what modulation and other useful information. The FCC ID for my remote control is LIV-LCPTX2G4 and for the matching train is LIV-LCPRX2G4. To get to that info I linked to, you can either browse to the “Equipment Authorization Search” on fcc.gov or you can use a site like fcc.io .
By going to the Test Report you see can see “…Remote Controller operating at 2.4GHz band” and “Type of modulation: GFSK modulation”. You’ll also find references to testing at 2402.000MHz, 2439.000MHz, and 2479.000MHz. So these are probably the frequencies that the different train models (all covered by this application) run at. Also in the Internal Photos document for the remote you’ll find great pictures like these:


The Internal Photos for the train itself are even more fun to see.
They both had that ITR242C module which is probably the RF transceiver, but I had trouble finding any documentation on it. Nonetheless, knowing a short list of frequencies to look at, and that it’s using GFSK modulation is all we need to try some stuff.
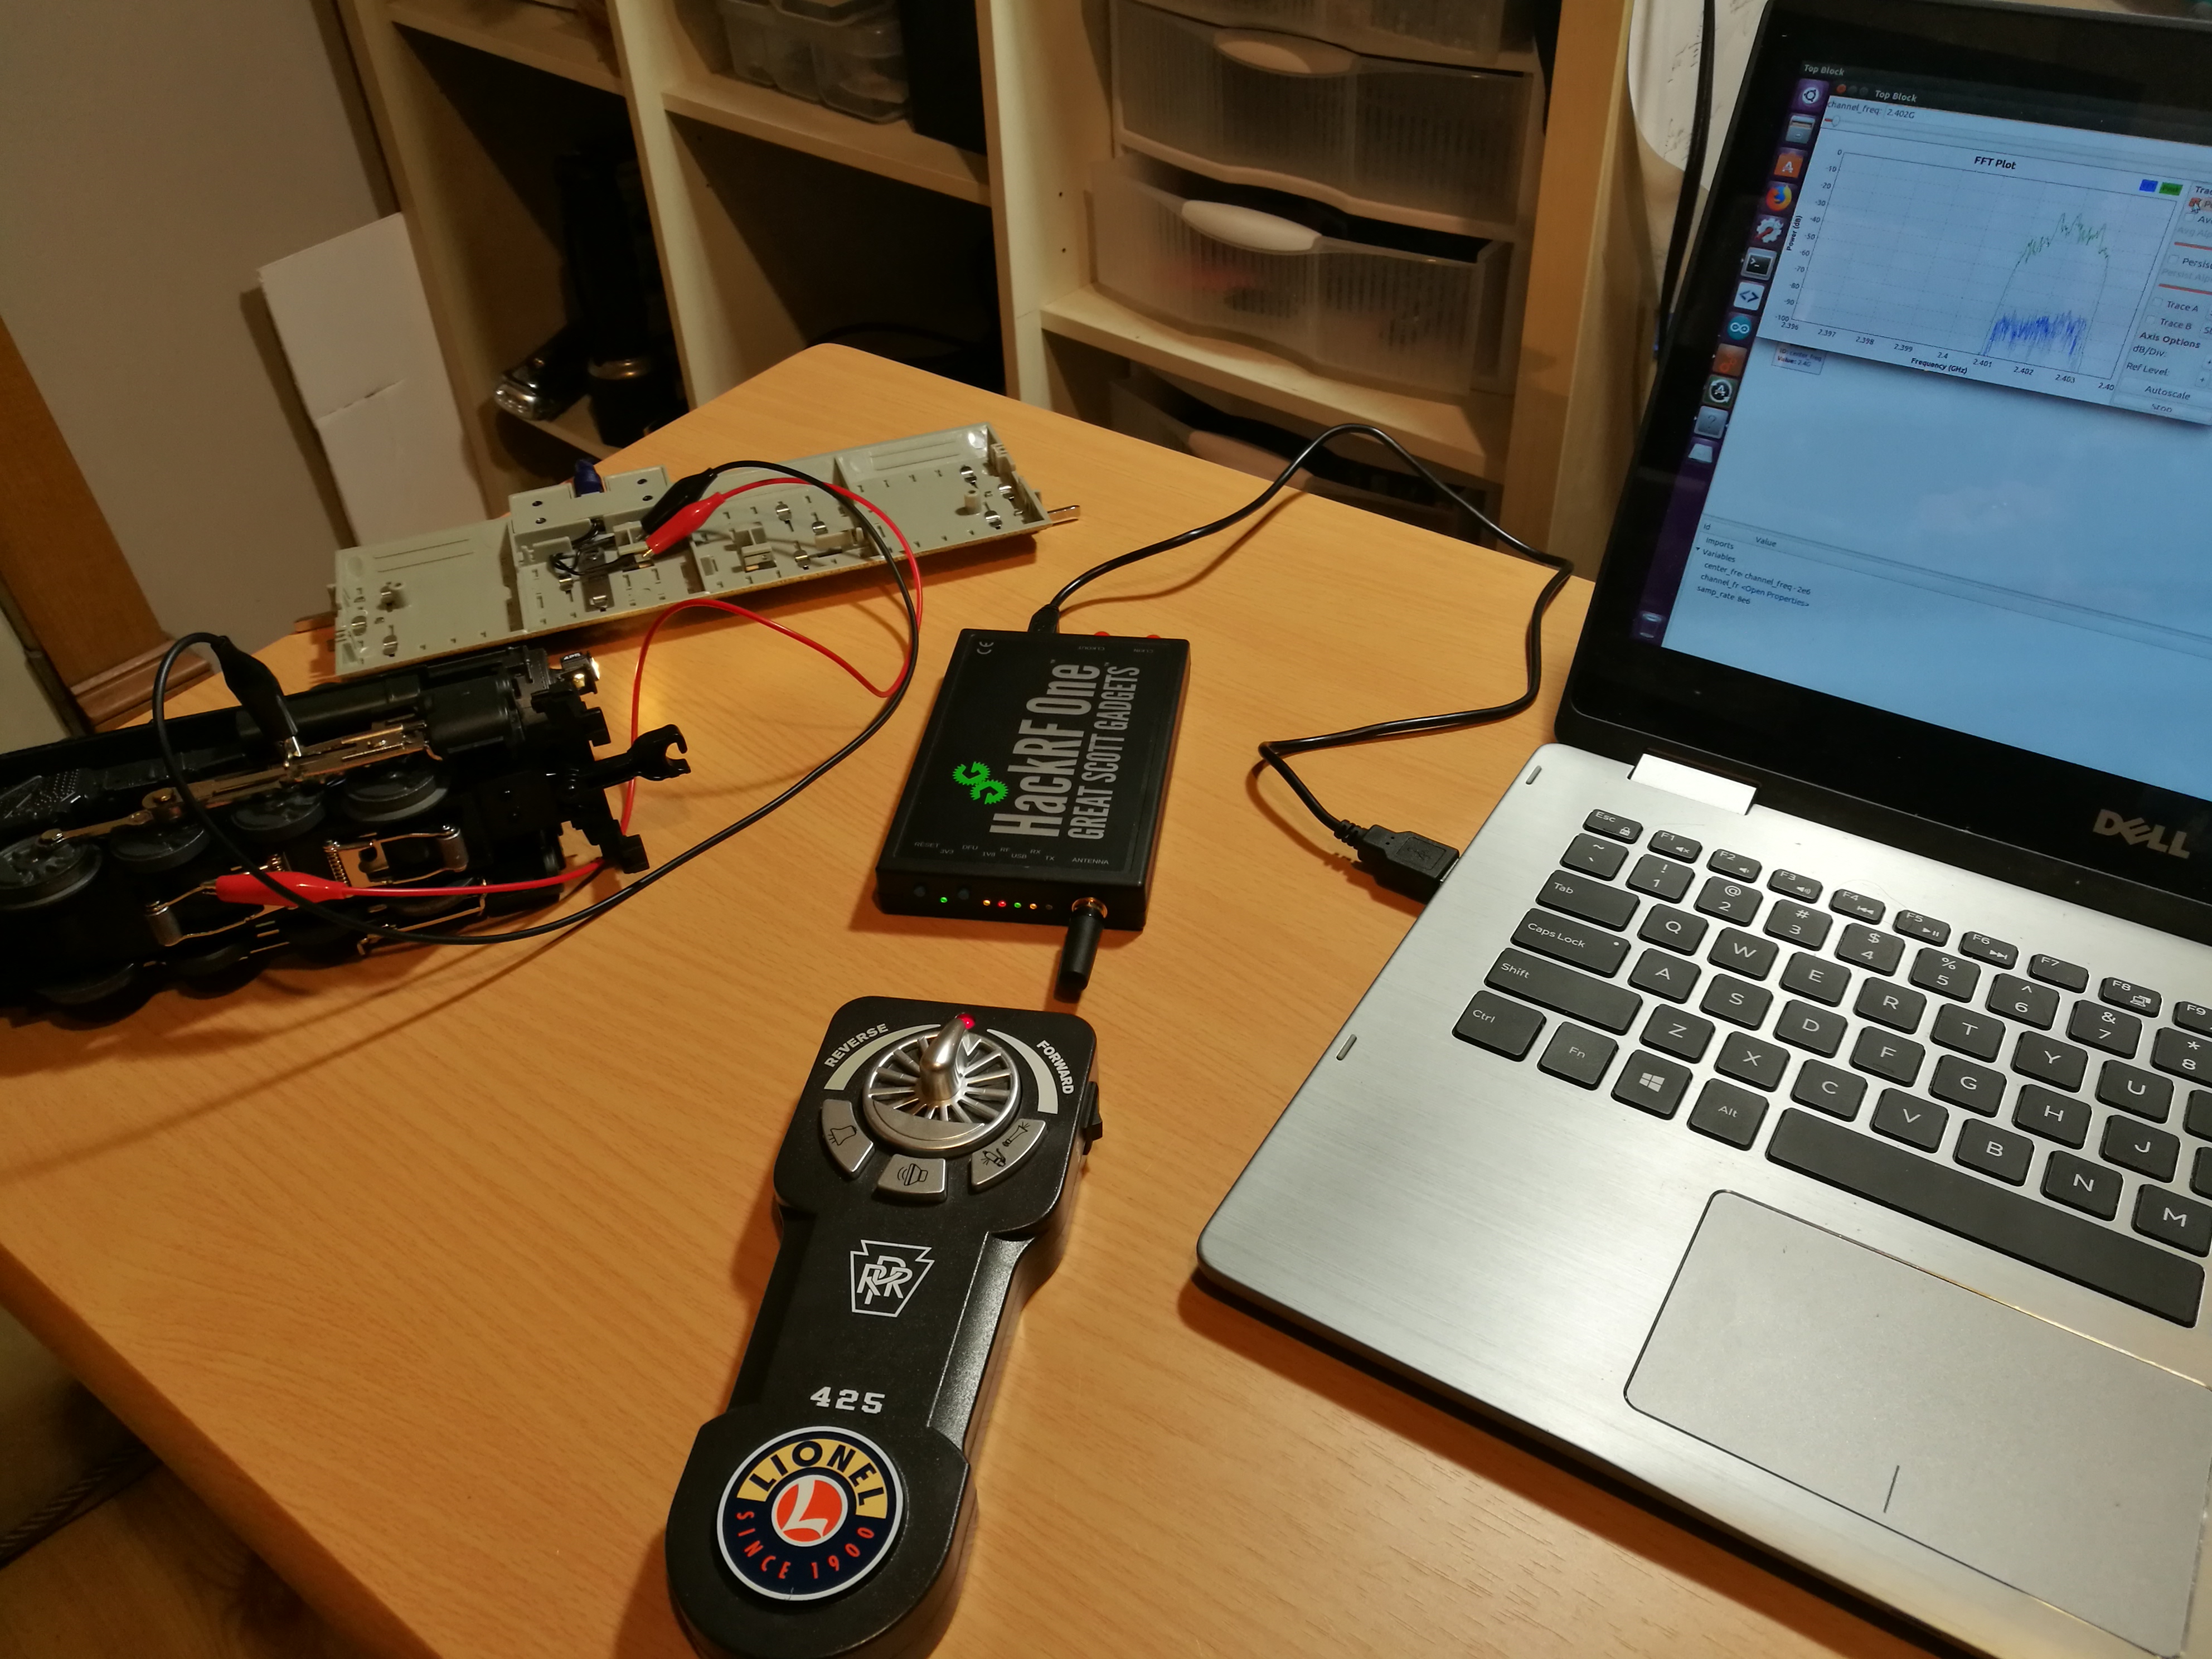
Here’s my setup with the train, remote, and HackRF to start analyzing signals:
Again, knowing that the train was operating in the 2.4GHz band and that it was using GFSK, I could have used a nRF24L01 or similar module to directly find the exact frequency/channel being used, addresses used, and what bits were being sent. Although the nRF24L01 technically does not have a promiscuous mode and only reports messages that are addressed to it, Travis Goodspeed worked out a way for the chip’s address check to be passed by RF noise and then it will pass along everything received including the actual addresses being used. I’m sure this would have worked with enough time and fiddling on my setup, surely even less time than I spent learning and fiddling with SDR, but like I said, I wanted this learning experience.
I used GNU Radio Companion to create flow graphs to find my signal of interest, record it, and confirm playing back that signal had the desired effect. I then used Inspectrum to have a closer look at the captured signal and work out details of its modulation and eventually the address used. Being new to SDR it took a little bit but eventually I figured out how this:


contained stuff like this:


From there I could see the preambles (either 10101010 <0xAA> or 01010101 <0x55>) followed by the hex addresses: 11, 27, 21, 94, 2A or 82, 73, 56, 45, C3. With those addresses and the exact center frequency (in my case 2.402 GHz), I could configure a nRF24L01 module with 2 read pipes (one for each address) and sniff and display entire transactions:
*****************RX_Mode start******************************
 11 27 21 94 2A : 08 A2 DD 74 47 57 7A 2A 5D 55 DB 42 55 56 F5 EA AA AA AA AA EE FE 22 4E 43 28 54 00 64 F4 BB 57
 11 27 21 94 2A : 1B 95 51 00 00 7F FF B7 E1 55 6A AB 24 D2 A8 A8 CA A9 AA F5 55 55 55 55 56 FE 22 4E 43 28 54 06
 82 73 56 45 C3 : 04 A3 05 3C BA 5A 6A 48 22 58 B4 53 17 55 C8 A5 D2 77 2A 9A 6C E3 E5 51 AC 9A 9A 4E AD 56 09 AB
 82 73 56 45 C3 : 04 A3 05 3C BA 4A 91 A4 5E 59 A2 B5 D2 58 B6 D5 2A 55 55 29 51 1A 9A 24 48 45 55 4B 44 B1 DB 8A
 11 27 21 94 2A : 18 95 51 03 00 7C FF A1 EC 51 64 CB 18 51 AD A5 5A 97 EB F5 55 55 55 55 56 D5 11 27 21 94 2A 00
 82 73 56 45 C3 : 05 A3 36 0D BD F4 AF E9 49 56 D6 56 BF 9E B2 D3 75 AF 6F D5 52 99 F4 EB AB 97 EE AD 77 2E F5 B4
 82 73 56 45 C3 : 05 A3 36 0D BF 62 B6 57 4E D5 94 B7 2D B7 7B E2 E5 8B 96 69 4A 92 93 52 90 96 22 F5 55 25 55 95
 11 27 21 94 2A : 19 95 51 03 00 7C FF 91 9D BA AC AA 94 5D 7E A8 95 5D DF FA AA AA AA AE AE FE 22 4E 43 28 54 02
 82 73 56 45 C3 : 06 A3 63 5E BA 2A B9 16 D2 89 AA 2D 2C FE B0 D9 07 AA D5 C5 B3 9F 6F 6B ED 2E 8D 2B AE B6 B3 DB
 11 27 21 94 2A : 1A 95 51 03 00 7C FF C1 0F 5B 54 6A 97 75 25 9A 55 5F 41 6A AA AA AA AA AE FE 22 4E 43 28 54 04
...
From there it just took gathering the output during different states of the remote control (stop, forward, reverse, etc.) and some trial and error to find the relevant messages to send to emulate the remote enough for the train to respond the way I needed. Once that was working it was simple to tie that into the Wemo emulation code to have the system triggered by voice commands through an Amazon Echo. That part wasn’t necessary but it was fun to see it working.

I’ve posted the code, some data captures, and some of the GRC flow graphs I used for analysis and testing here: https://github.com/bobparadiso/AmazonEchoLionelTrain
